In this blog, we can learn how to connect two salesforce orgs using Named Credentials. This will help in data sharing between two salesforce orgs.
By using Named Credentials, we can securely handle the authentication process without the need to store sensitive credentials in Apex code.
Using Named Credentials in Salesforce-to-Salesforce integration offers a clean, secure, and scalable way to handle authentication and data exchange between two Salesforce orgs. Named Credentials enhance the security, maintainability, and efficiency of your integrations.
PRE-REQUISITES
- Two Salesforce orgs. One is Source Salesforce Org and another is Target Salesforce Org.

Steps
Step 1: Create a connected app in Target Salesforce Org.
Step 1: Create a connected app in Target Salesforce Org.
- Go to Setup -> Quick Find -> Search “App Manager” -> Click on App Manager

- Click on “New Connected App”.
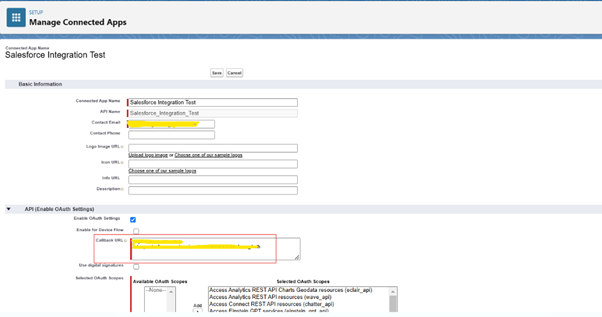
- Enter “Connected App Name”, “Contact Email” and check the “Enable OAuth Settings” checkbox.

- Enter Dummy Url [example: “https://test.com” ] in Callback URL.
- Select OAuth Scopes and click on Save.

- Once connected app is created. Click on “Manage Consumer Details” button to get the Consumer Key and Consumer Secret.
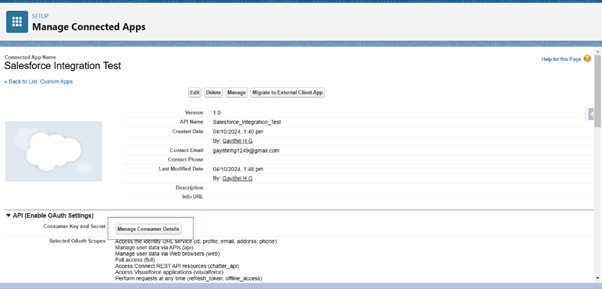
- Copy the consumer key and consumer secret.

Step 2: Create an Auth Provider in source salesforce org.
Step 1: Create an Auth Provider in source salesforce org.
- Go to Setup -> Quick Find -> Search “Auth. Providers” -> Click on Auth. Providers.
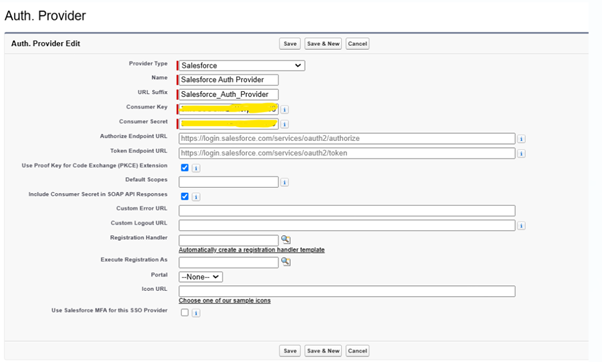
- Click on New Button. Select “Provider Type” as “Salesforce”.
- Enter Name, URL Suffix.
- Paste the Consumer Key and Consumer Secret which are copied from target salesforce org and Click on Save button.
Once Auth. Provider details are saved. It will provide the Callback URL and copy the callback URL.
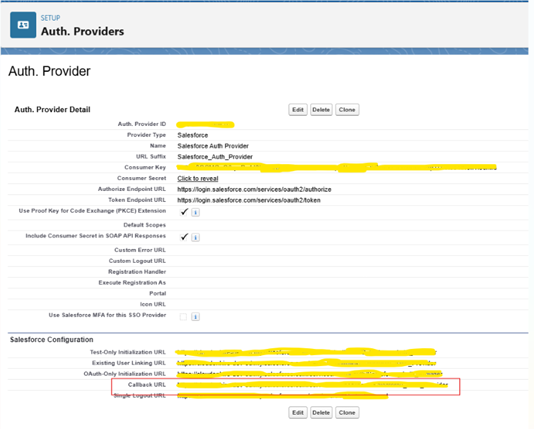
In target salesforce org, Edit the created connected app and replace the dummy callback URL with actual callback URL [copied URL from the source org].
Step 3: Create a Named Credential in source salesforce org.
Step 3 : Create a Named Credential in source salesforce org.
- Go to Setup -> Quick Find -> Search “Named Credentials” -> Click on Named Credentials.
- Click on New Legacy. Enter label, name and copy the url of target salesforce org and paste in the URL text box.
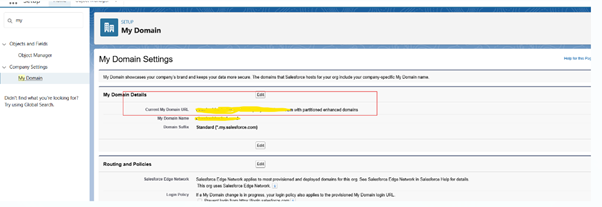
How to get the url of target salesforce org : In target salesforce org, Go to Setup -> Quick find -> Search for “My Domain” -> Click on “My domain”
It show the current domain url.
- Select “Identity Type” as “Named Principal”.
- Select “Authentication Protocol” as “OAuth 2.0”.
- Select the created “Auth.Provider” from the “Authentication Provider” search lookup.
- Enter the “Scope” as “refresh_token full”.
- Click on Save
Once save button is clicked, it will open the salesforce login page. We need to login into the target salesforce org.
Once successfully logged into the target salesforce org, in the created named credentials shows the “Authentication Status” as “Authenticated as with username of target salesforce org”.
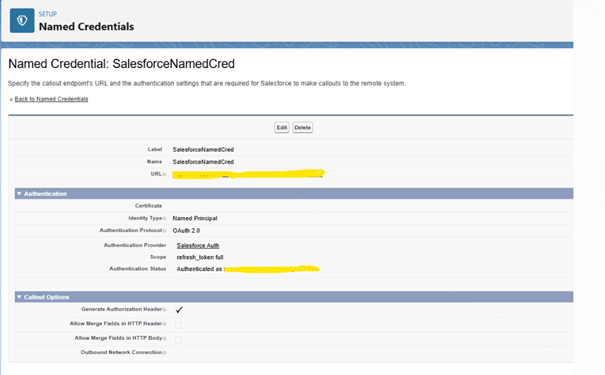
Connection between two salesforce orgs is established successfully.
Below is the sample code to create an account in target org from the source org using REST API and Name Credentials for authentication.
Step 4: Create REST API in salesforce apex in target salesforce org.
Step 4 : Create REST API in salesforce apex in target salesforce org.
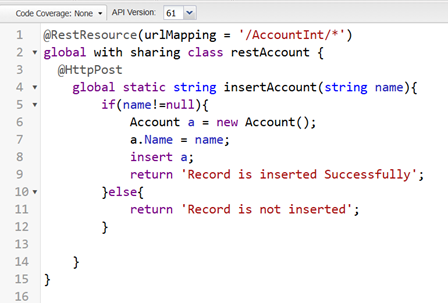
Create a simple REST API in salesforce using apex. This API allows to insert an account record by passing the “name” as a parameter.
Step 5 : Create a HTTP Callout apex class in source org.
Step 5 : Create a HTTP Callout apex class in source org.
Below is the code for making a callout to a target Salesforce org’s REST API and sending a specified JSON payload using a Named Credential for authentication.
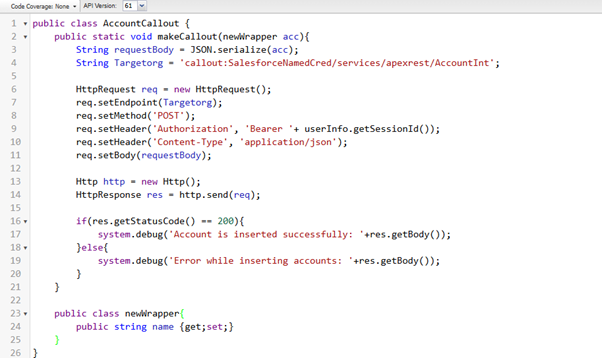
When running the code, this will create an account in the target org with name specified in the json.
To run the code, Go to the anonymous window and Type

Click Execute. Then login into the target org. Click App Launcher and select Account. In the list view new account is created with name sample account.
