In this Blog I am going to Talk about
Marketing Cloud Connect
Connecting the Clouds
Sending Email from salesforce using Marketing cloud
Tracking & Reporting
The first question to consider is: Why do we need Marketing Cloud Connect?
Marketing Cloud Connect can significantly enhance our customer experience by bridging the gap between our sales and marketing teams. Often, sales teams may not have the resources or expertise to create the most effective marketing strategies, and vice versa. By seamlessly connecting these two departments through Marketing Cloud Connect, they can gain a unified view of the customer journey and collaborate to develop the best possible strategy for the organization.

Here in this Blog we are going to show you one-one org i.e One Marketing Business units to one Salesforce CRM org, not on multi org connection. Below are the important points to be considered.
Step 1: Setup the marketing cloud connect in Salesforce.
Review Prerequisites & install Package:
- Review Prerequisites
- User Type & permissions
- Account Configuration & data access
- Install Managed Package
- Apply Admin permission
- Set up salesforce system user
Step 1: Setup the marketing cloud connect in Salesforce
Step 1: Setup the marketing cloud connect in Salesforce
-
- Prerequisites:To use Marketing Cloud Connect effectively, you’ll need access to the following:
Marketing Cloud Account: A valid Marketing Cloud account is essential. While a Salesforce Marketing Cloud (SFMC) demo org may provide some basic functionality, a full Marketing Cloud account offers the necessary features for a successful implementation.
Salesforce Sales Cloud Account (Any Edition): A Salesforce Sales Cloud account in any edition is required to leverage the integration capabilities of Marketing Cloud Connect.
- Prerequisites:To use Marketing Cloud Connect effectively, you’ll need access to the following:
- Install the marketing cloud Connect Managed package. Download the managed package to get the tools to make the connection work.
- Paste this URL in your browser, which redirects to the latest managed package version. You’re prompted to log in to Salesforce using your administrator credentials.
i) Production Org: https://sfdc.co/MCC
ii) Sandbox Org: https://sfdc.co/MCCSandbox
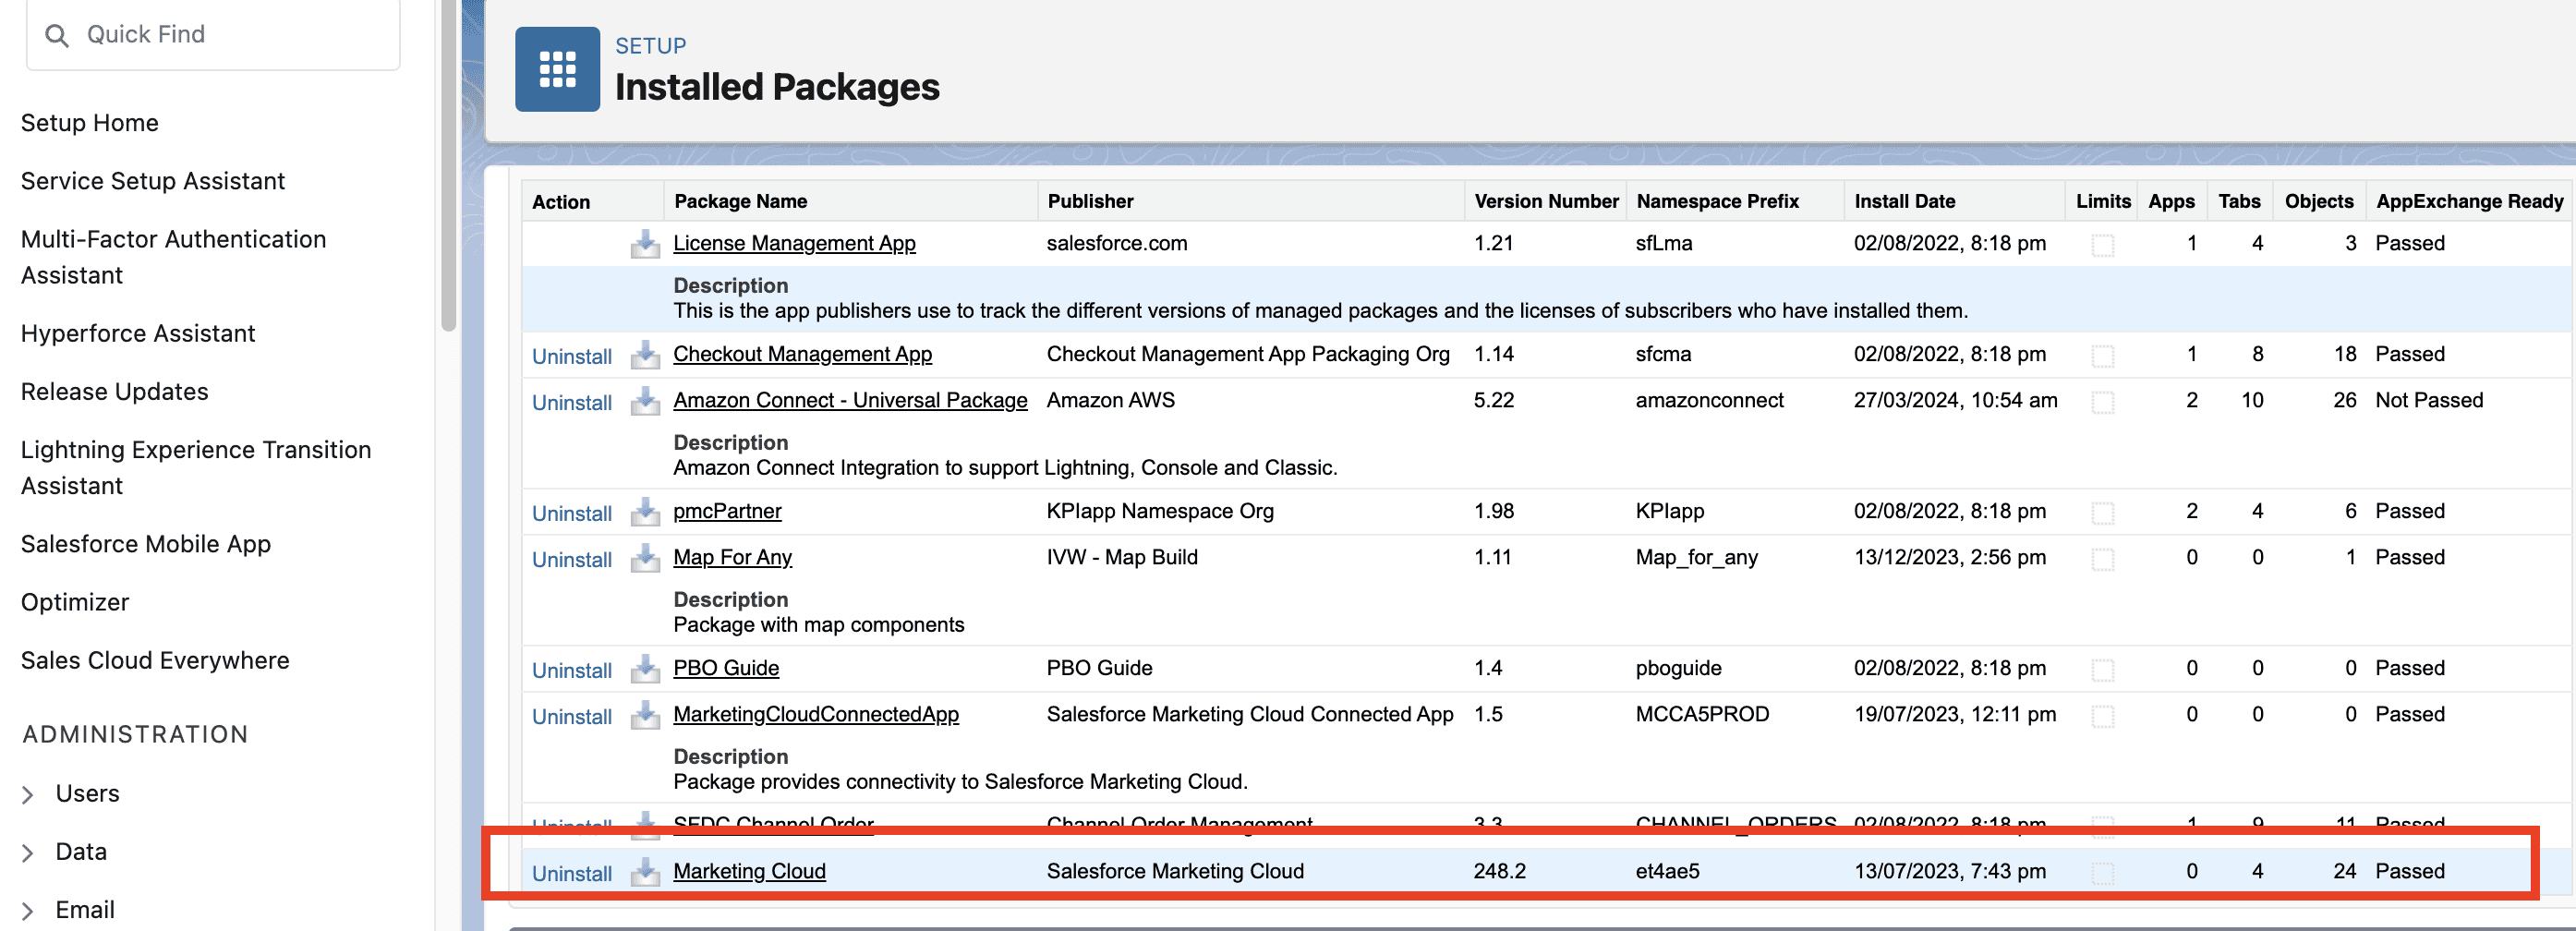
Image: Latest managed package Installed on Salesforce CRM
3. Edit the user Page layout:
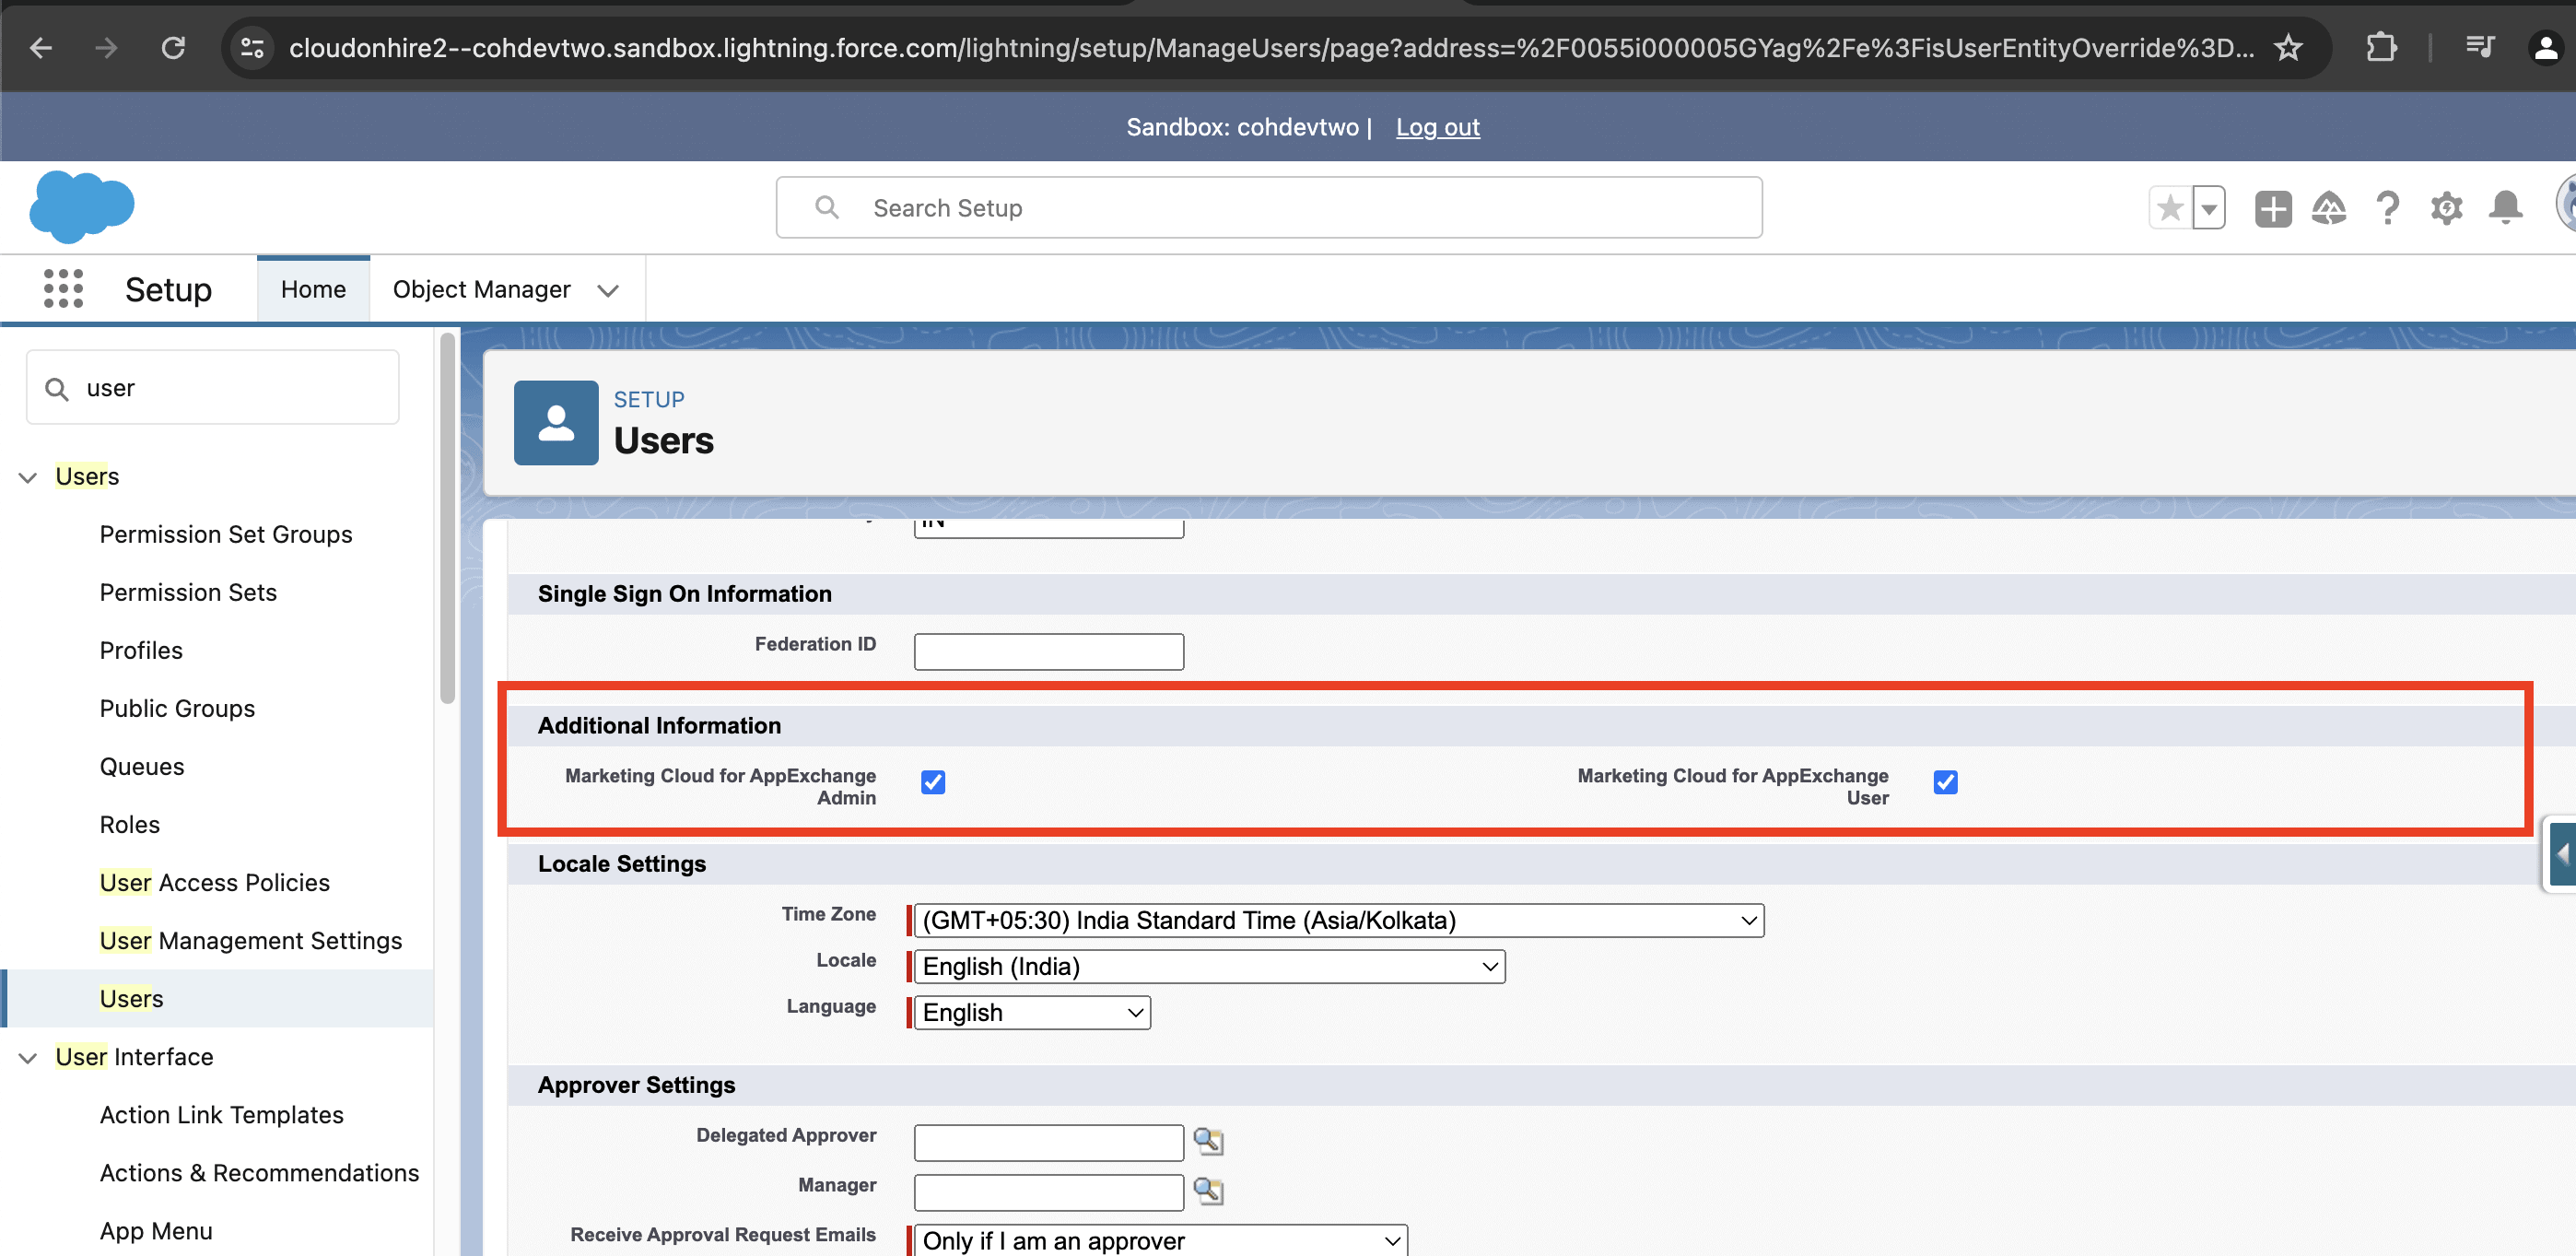
- Add the Marketing Cloud for AppExchange user field.
- Add the Marketing Cloud for AppExchange Admin Field.
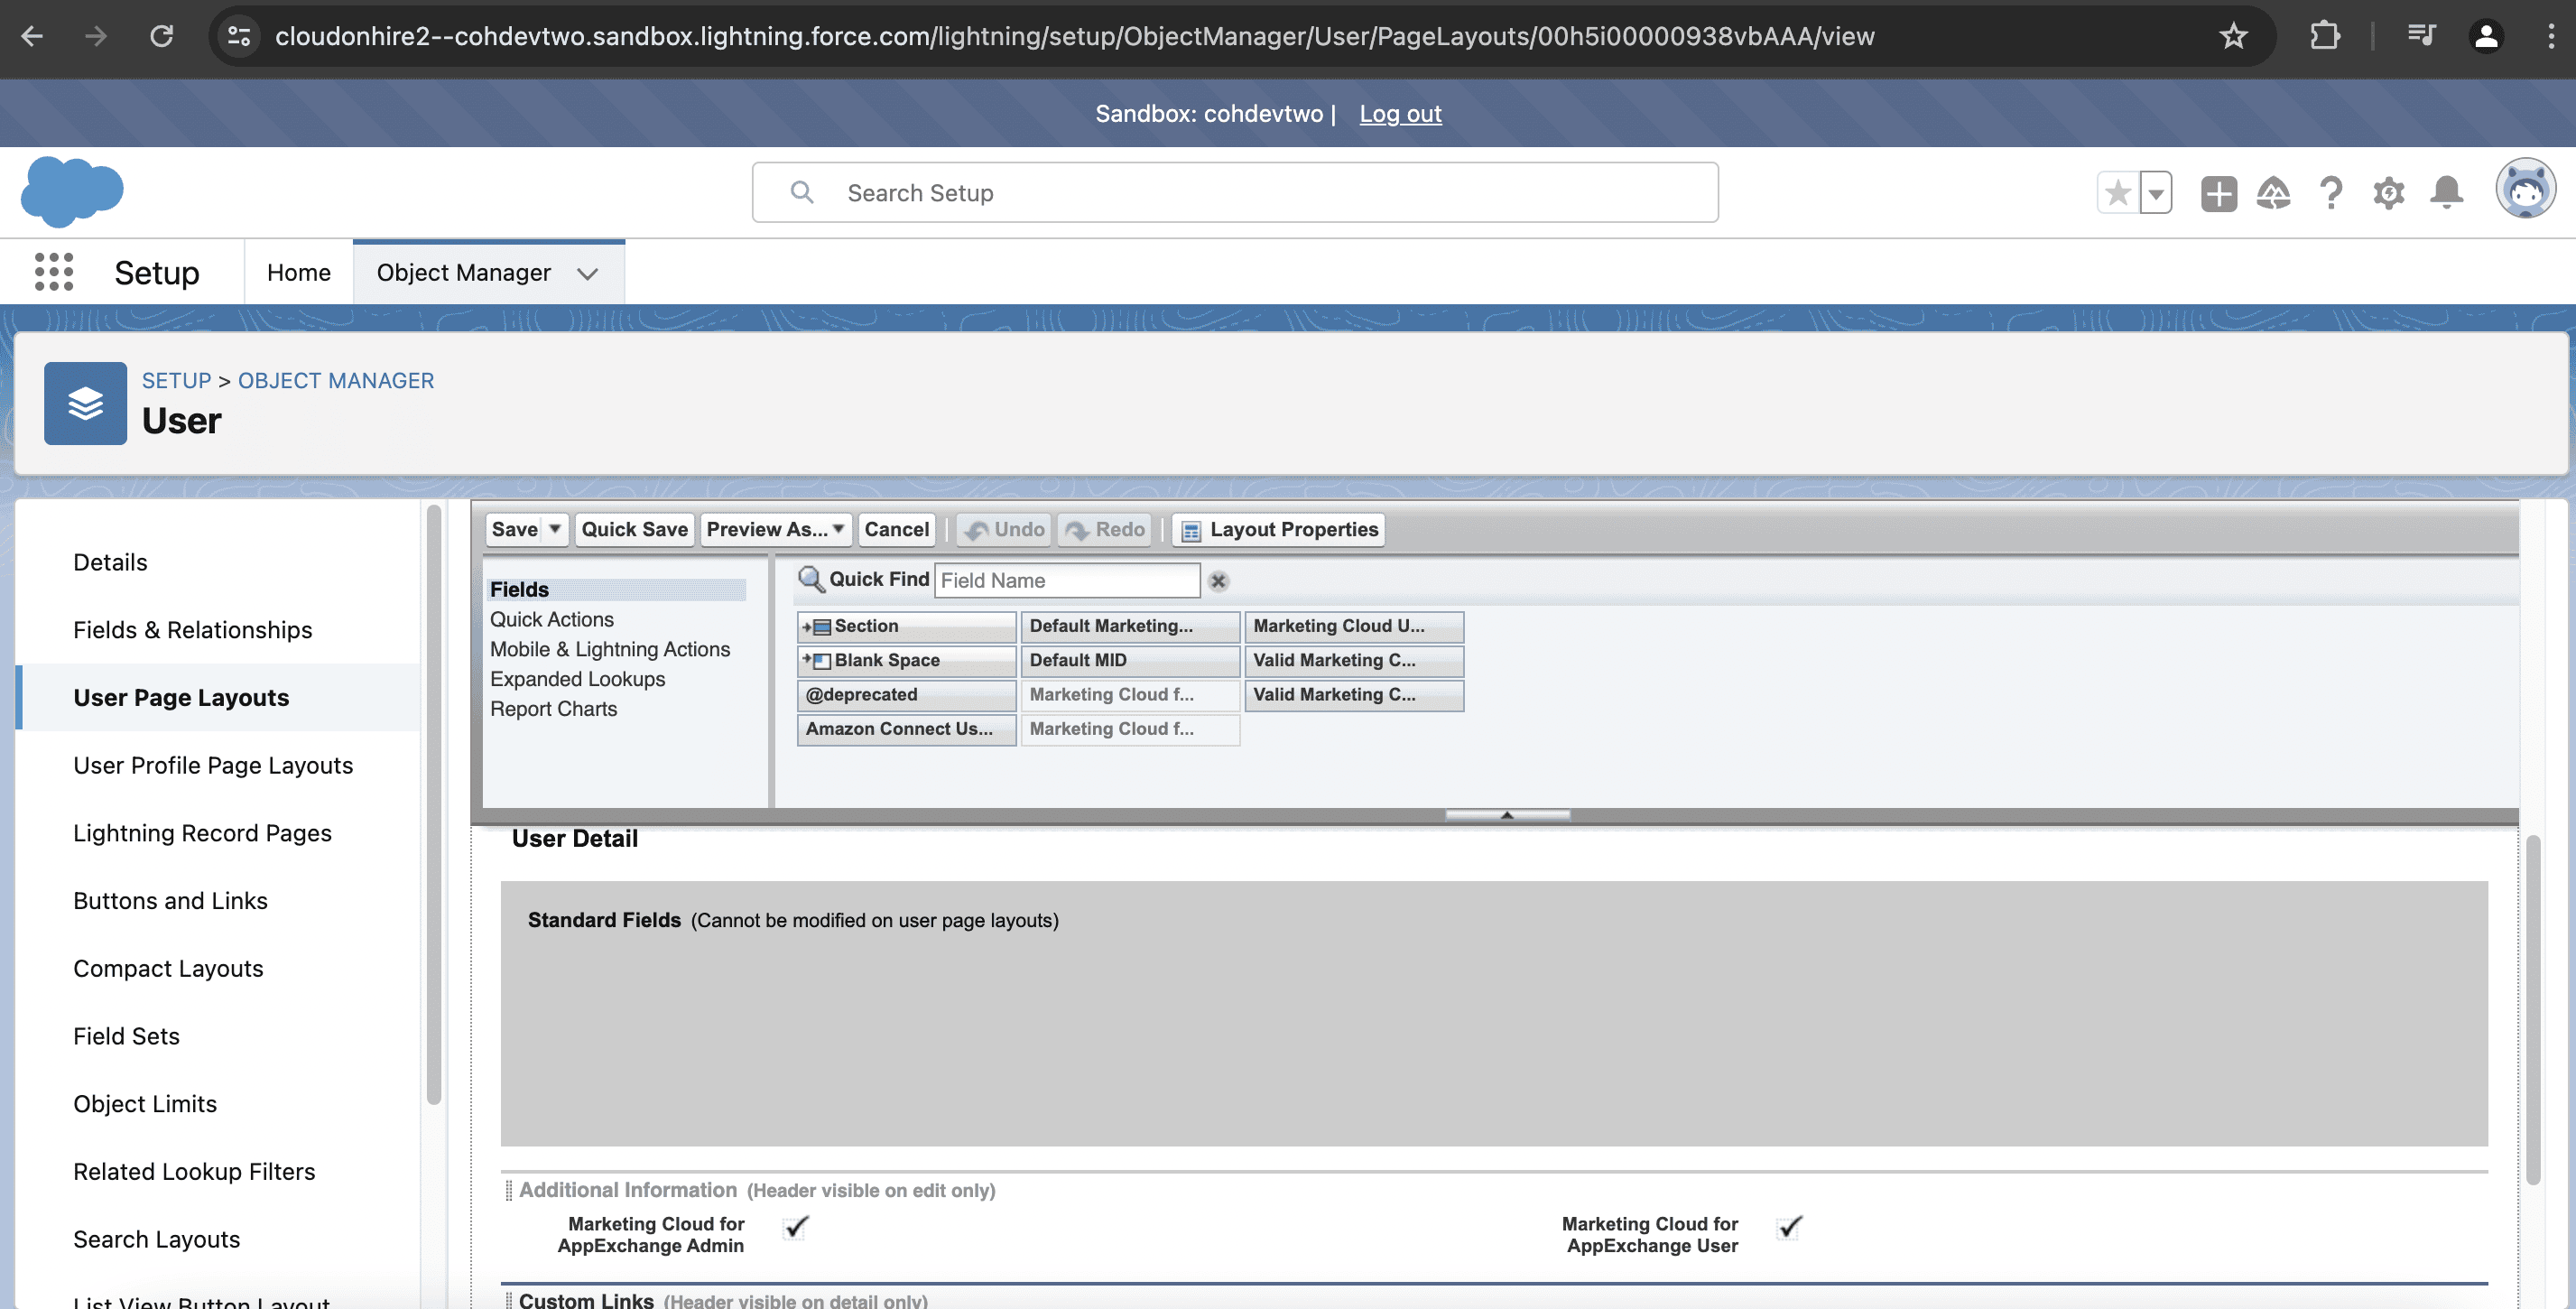
Image: Use Page Layout
4. Now move to Marketing Cloud Environment In Marketing Cloud go to Setup:
- Go to App -> Salesforce Integration.
- Click on Upgrade to Connected App.
- Create an API user in Marketing Cloud with Admin and MC Admin roles Assigned.
These Users should be assigned a Roles as both Administrators & Marketing Cloud administrators.
API User = Yes
- Configure Connected App for Successful Authentication in Sales cloud->Go to manage connected Apps
- Salesforce Marketing Cloud
- Edit policies – under Permission Users, select ‘Admin approved users are pre-authorised’
- Under Relaxation, select Relax IP restrictions. Make sure the user have the permission set Assignments is set: screenshot. When everything is set you will see under the API user you created.
Check salesforce.com status should be Integrated :
Salesforce.com Status = Integrated
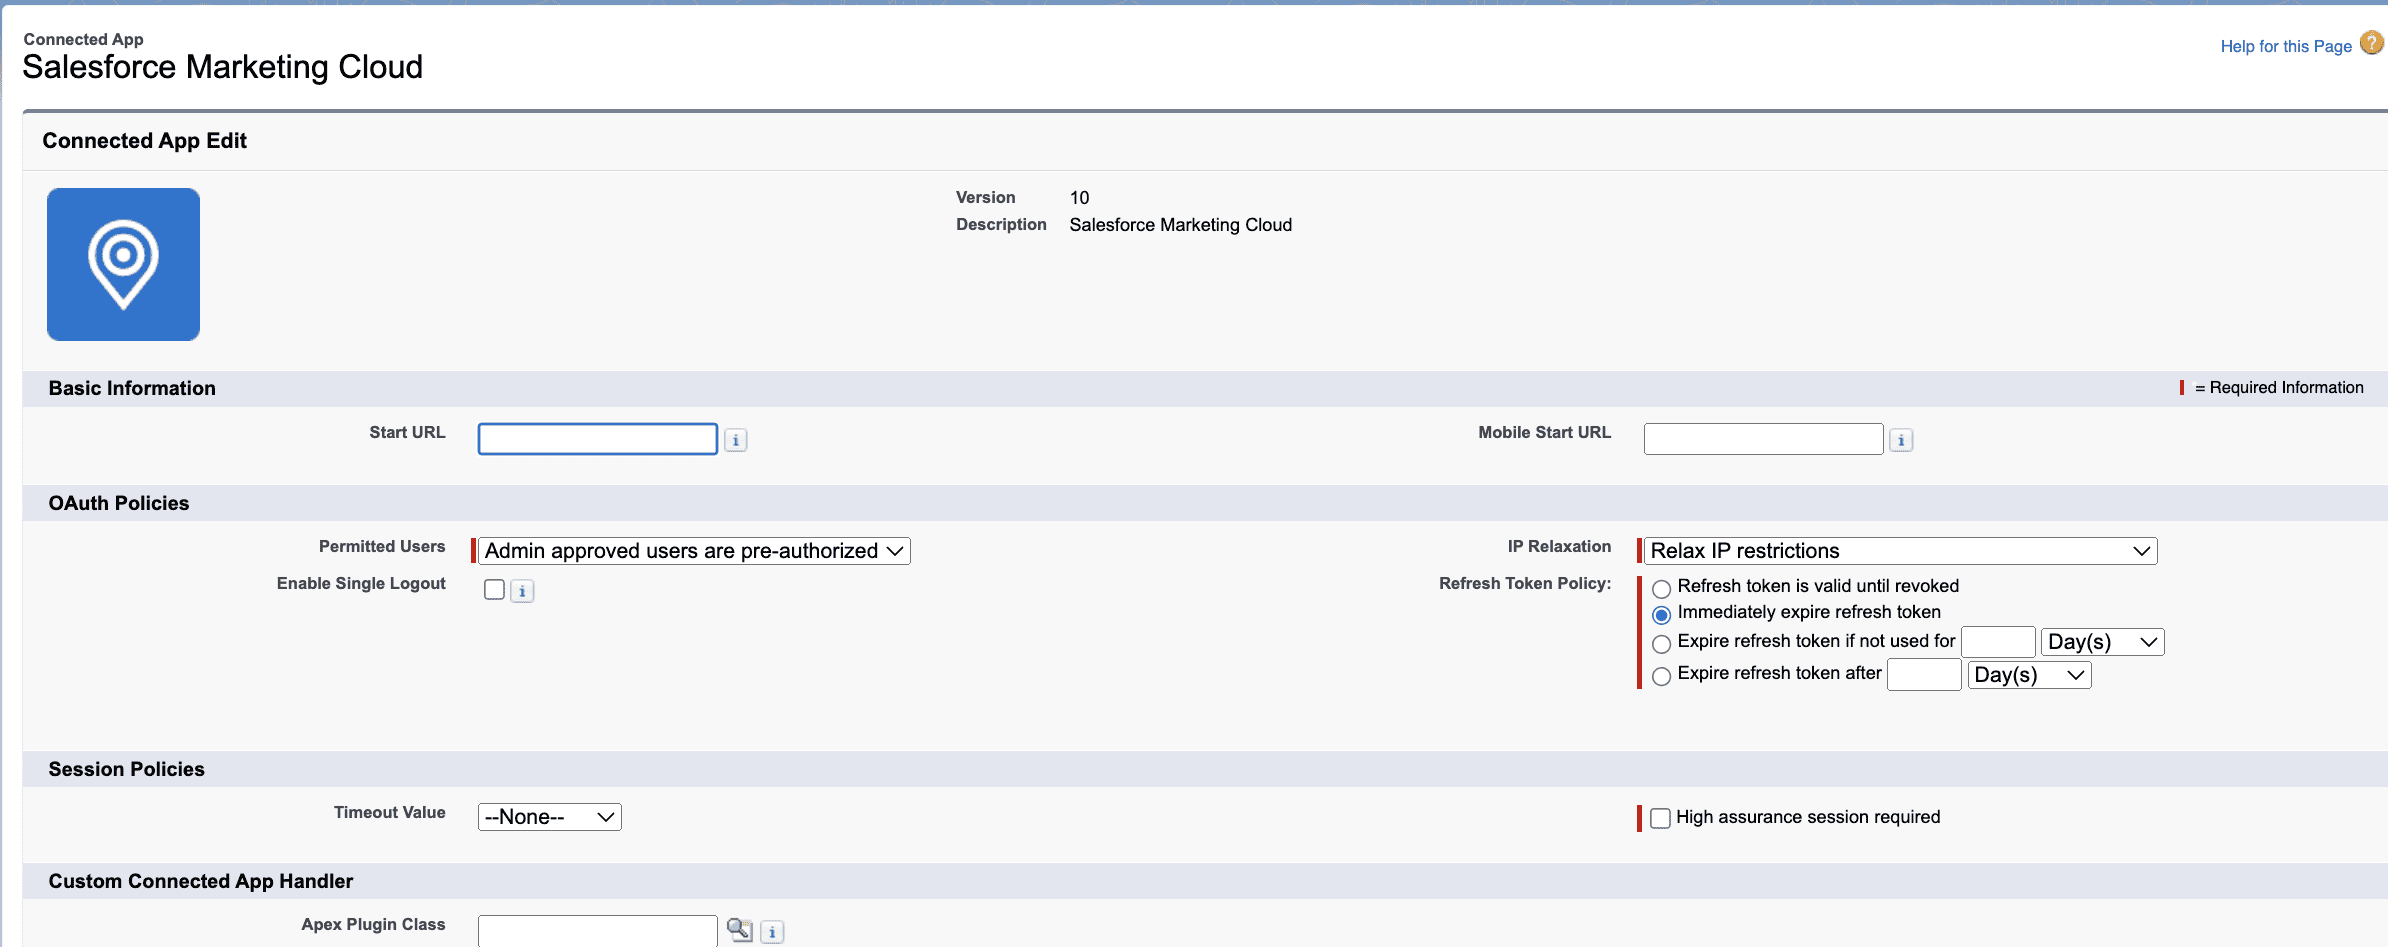
Image: Sales cloud Connected App
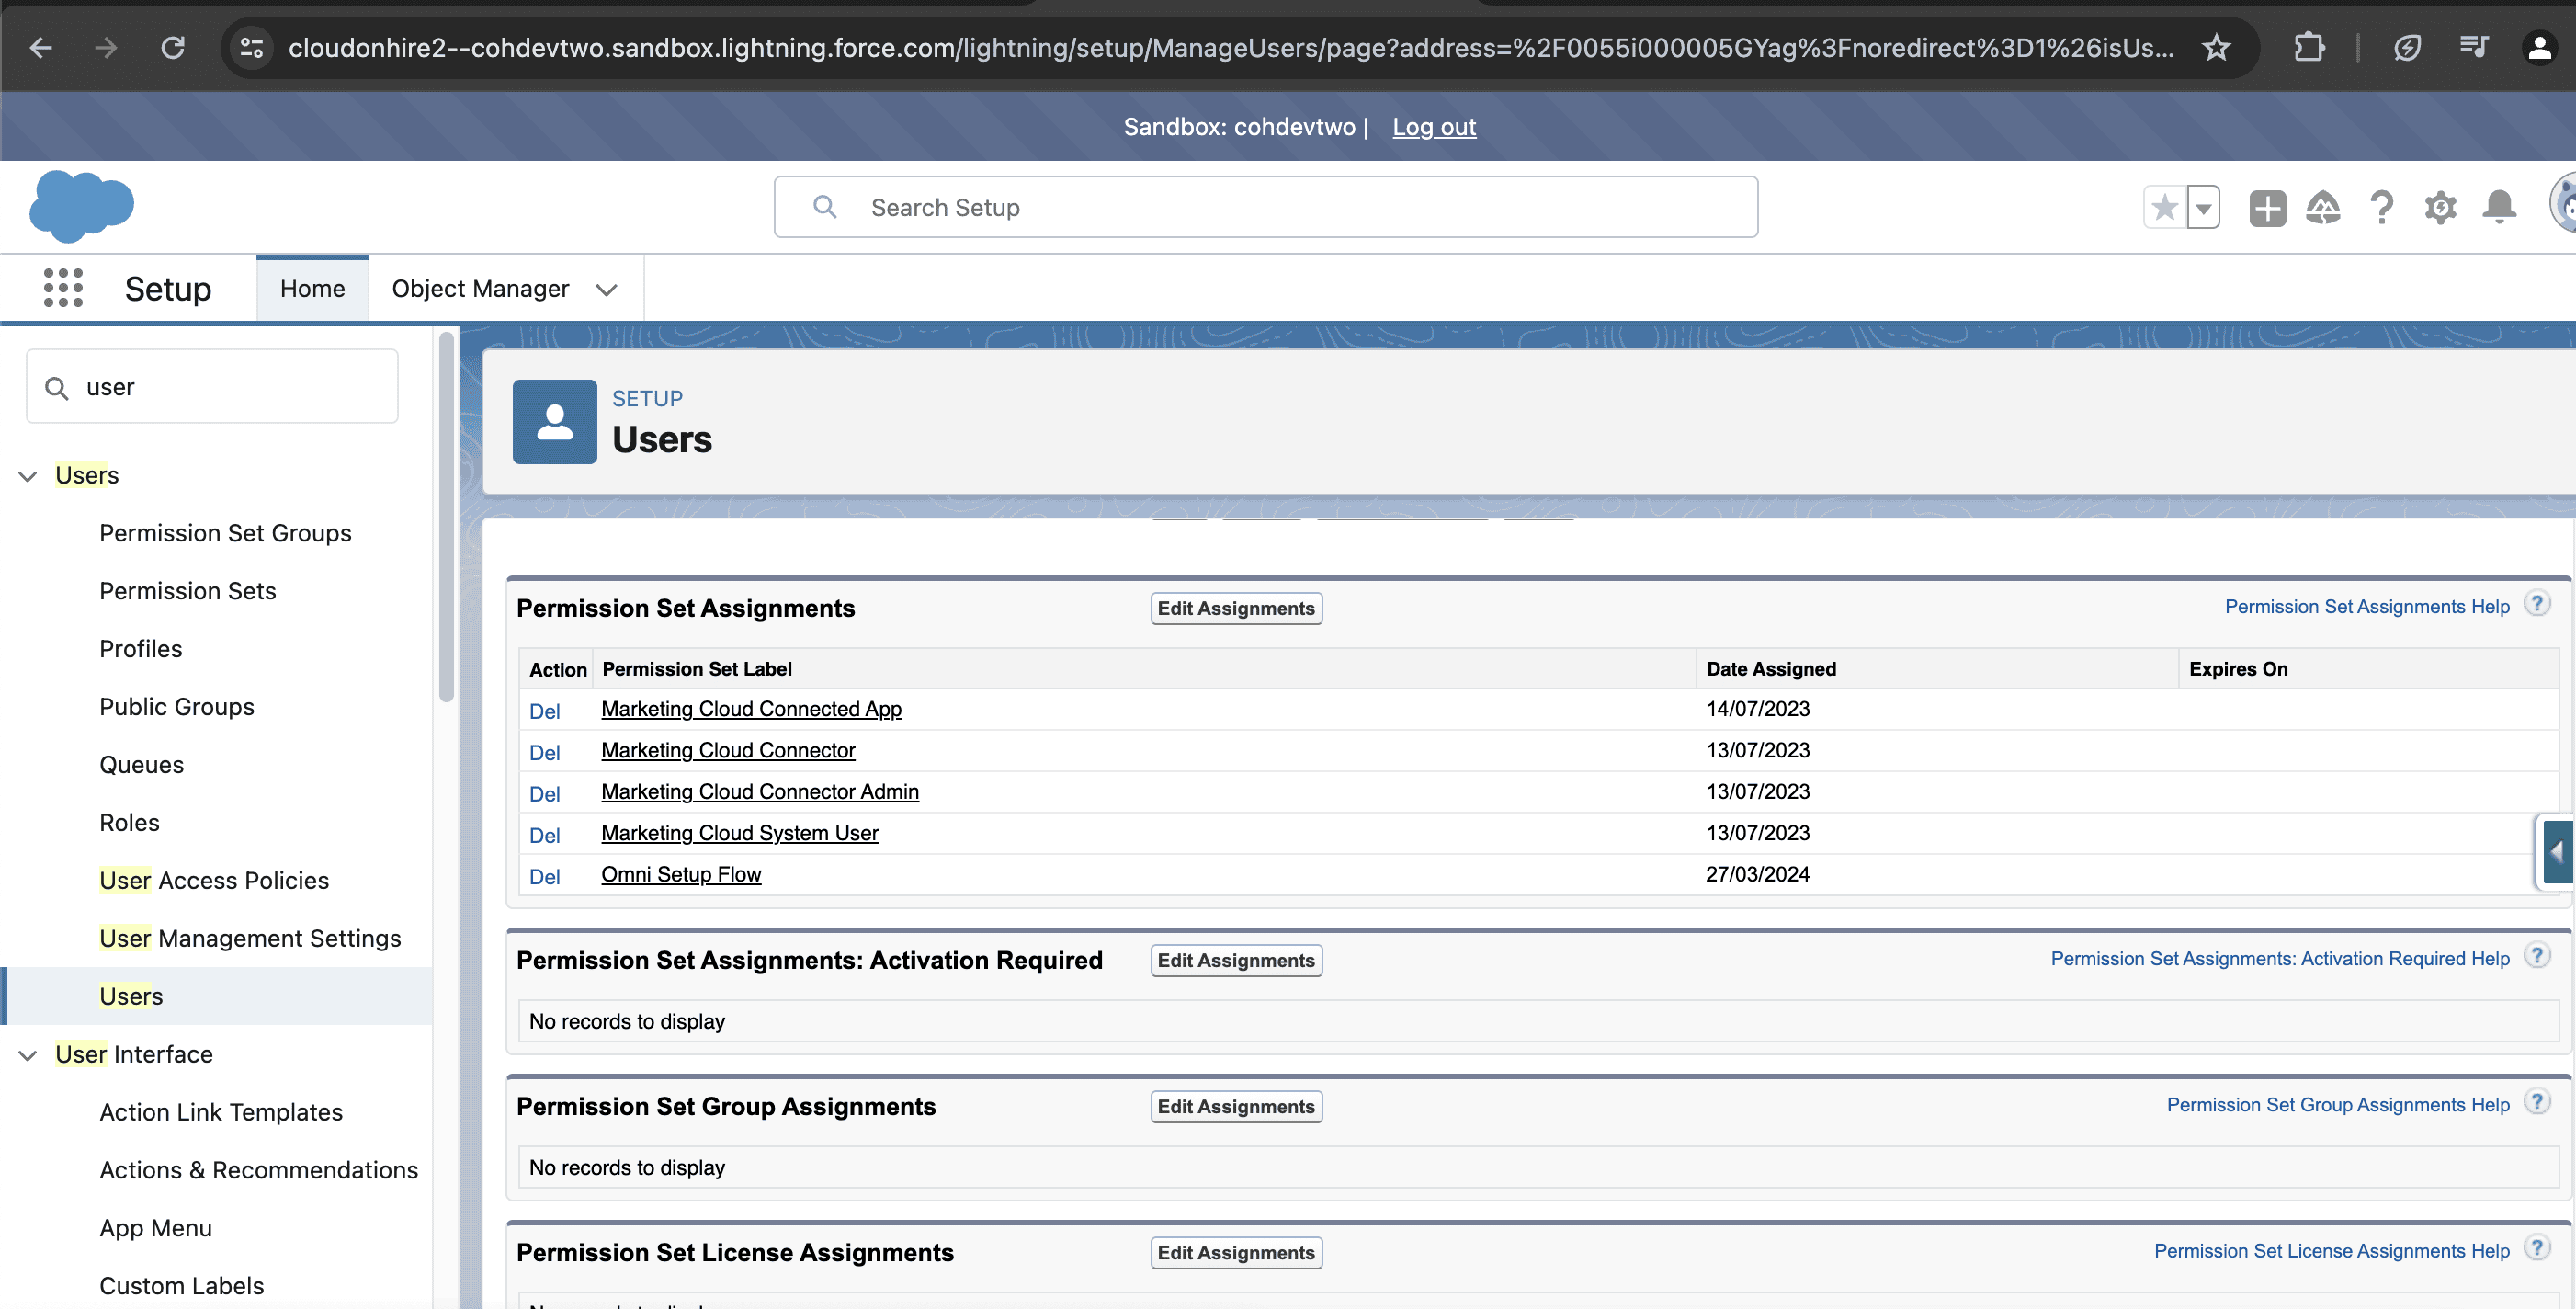
Image: Permission set Assignment
Step 2: For leveraging Marketing Cloud Connector
Step 2: For leveraging Marketing Cloud Connector
- Back to salesforce CRM, in setup type process automation & select process Automation settings. -> Set Default Workflow user -> use your Tracking MC user.
- We need certain Fields & buttons in our page layout, let us take contact page layout in our Salesforce CRM.
- In the contact Page layout under related list make sure, Email sends & Individual Email Results & Visualforce pages->Contact Actions are dragged under Additional Information.
4. Now let us see Marketing Cloud App from App launcher & click Connect to Marketing cloud, it will ask your Marketing cloud API login Credentials.
Your Marketing Cloud Connector Settings will look like this, you can edit settings.

Image: Marketing Cloud Connector Settings
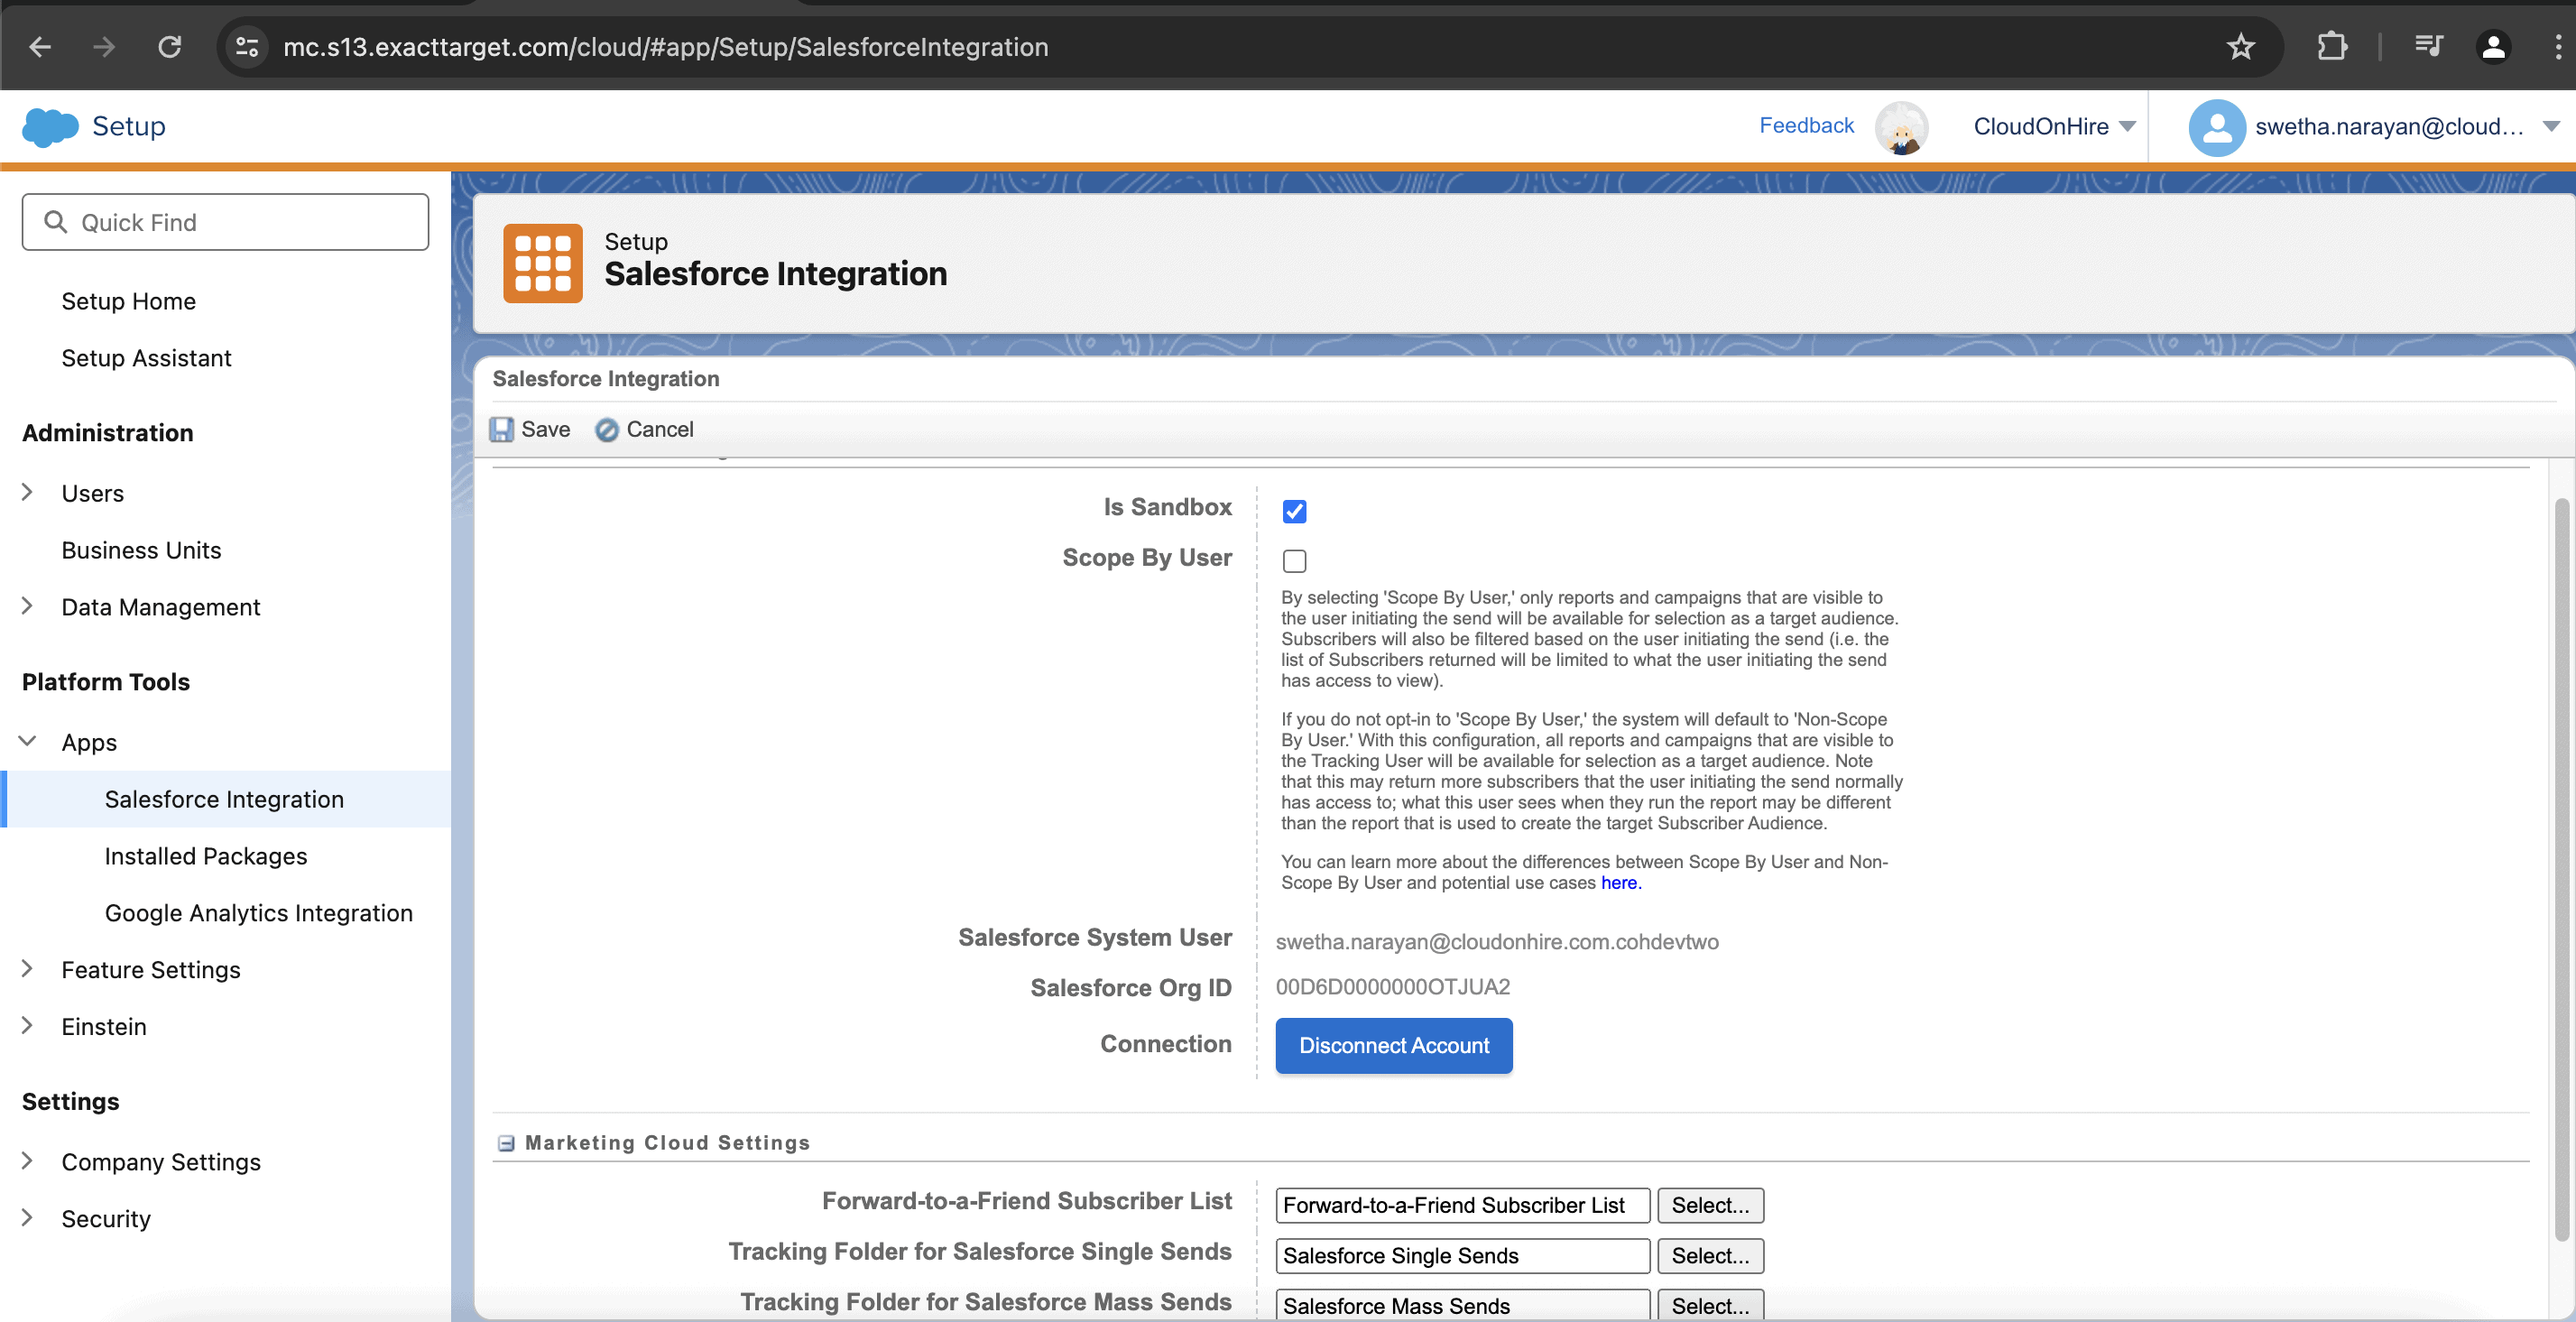
Image: Connected Account
- Send type Emails.,
- Triggered Sends -> good to select Objects like Account, Case, Contact.
-
Notifications etc. & do Save settings.
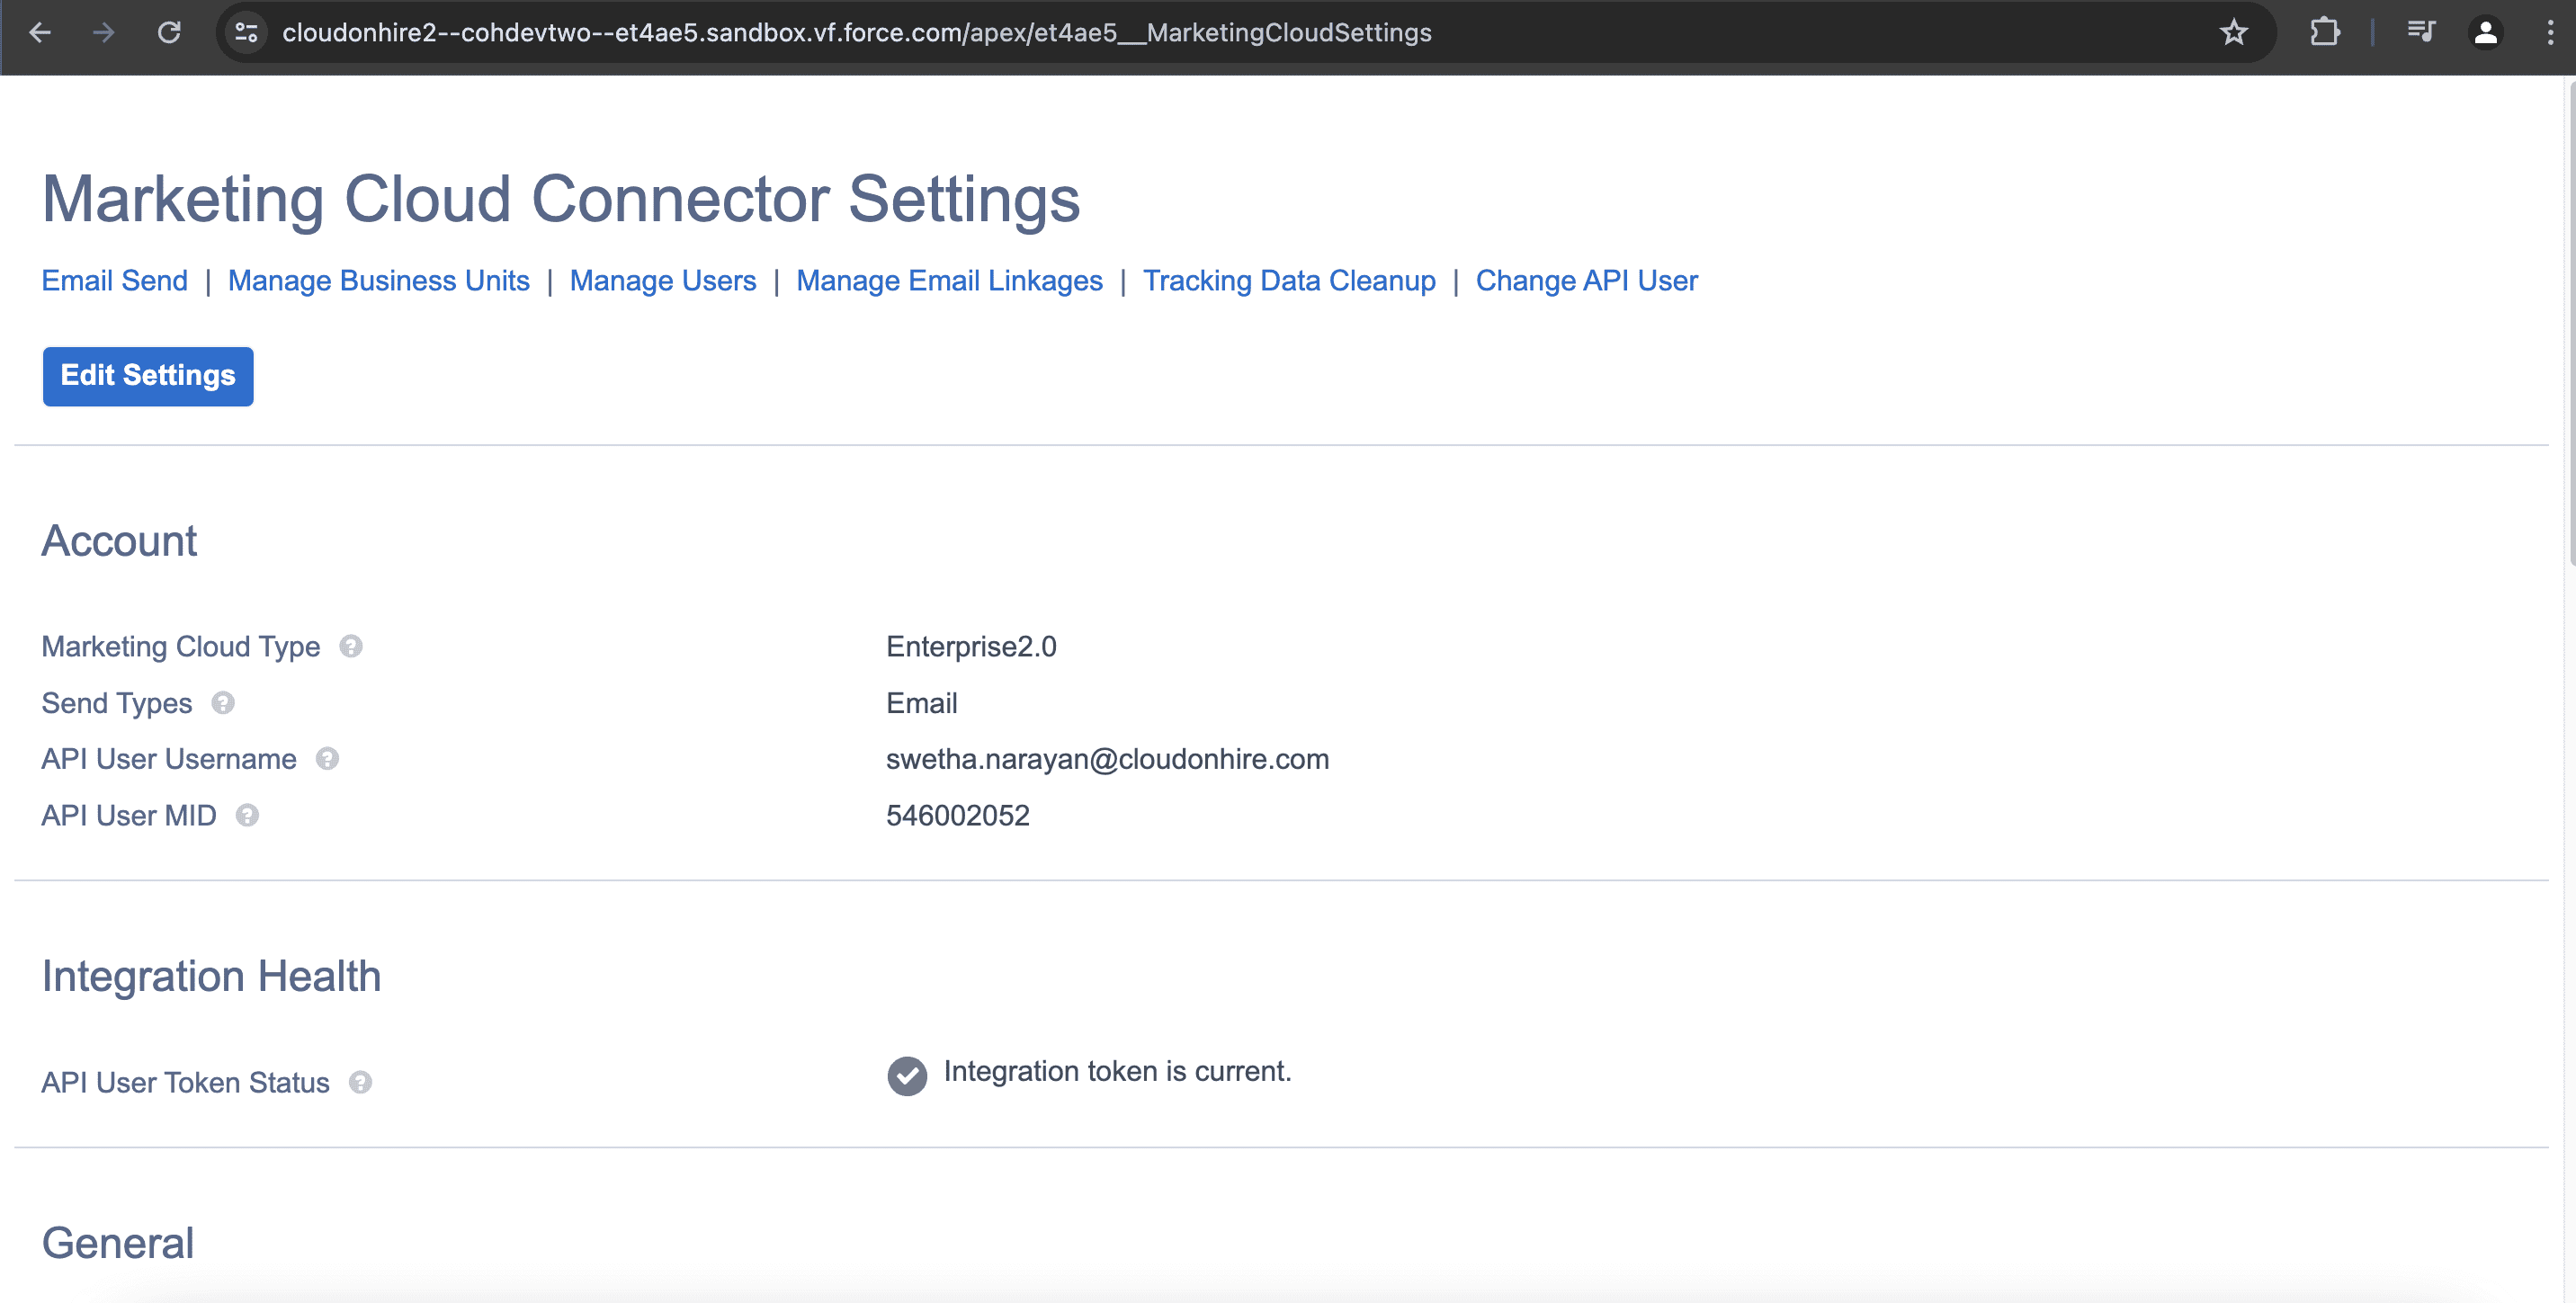
Image: Marketing Cloud Connector Settings
- Then we need to choose Business units where exactly we need to get these integrations works. WoooH…!! Connector setup is done!!
Step 3: Send Email from Marketing Cloud
Step 3: Send Email from Marketing Cloud
1. Click on Email send button.
Find Email that is coming from Marketing Cloud -> select shared content. Create a report on Contacts & account – & click send , you should be able to see the new email triggered to all the Contacts & you can see email send details as below.
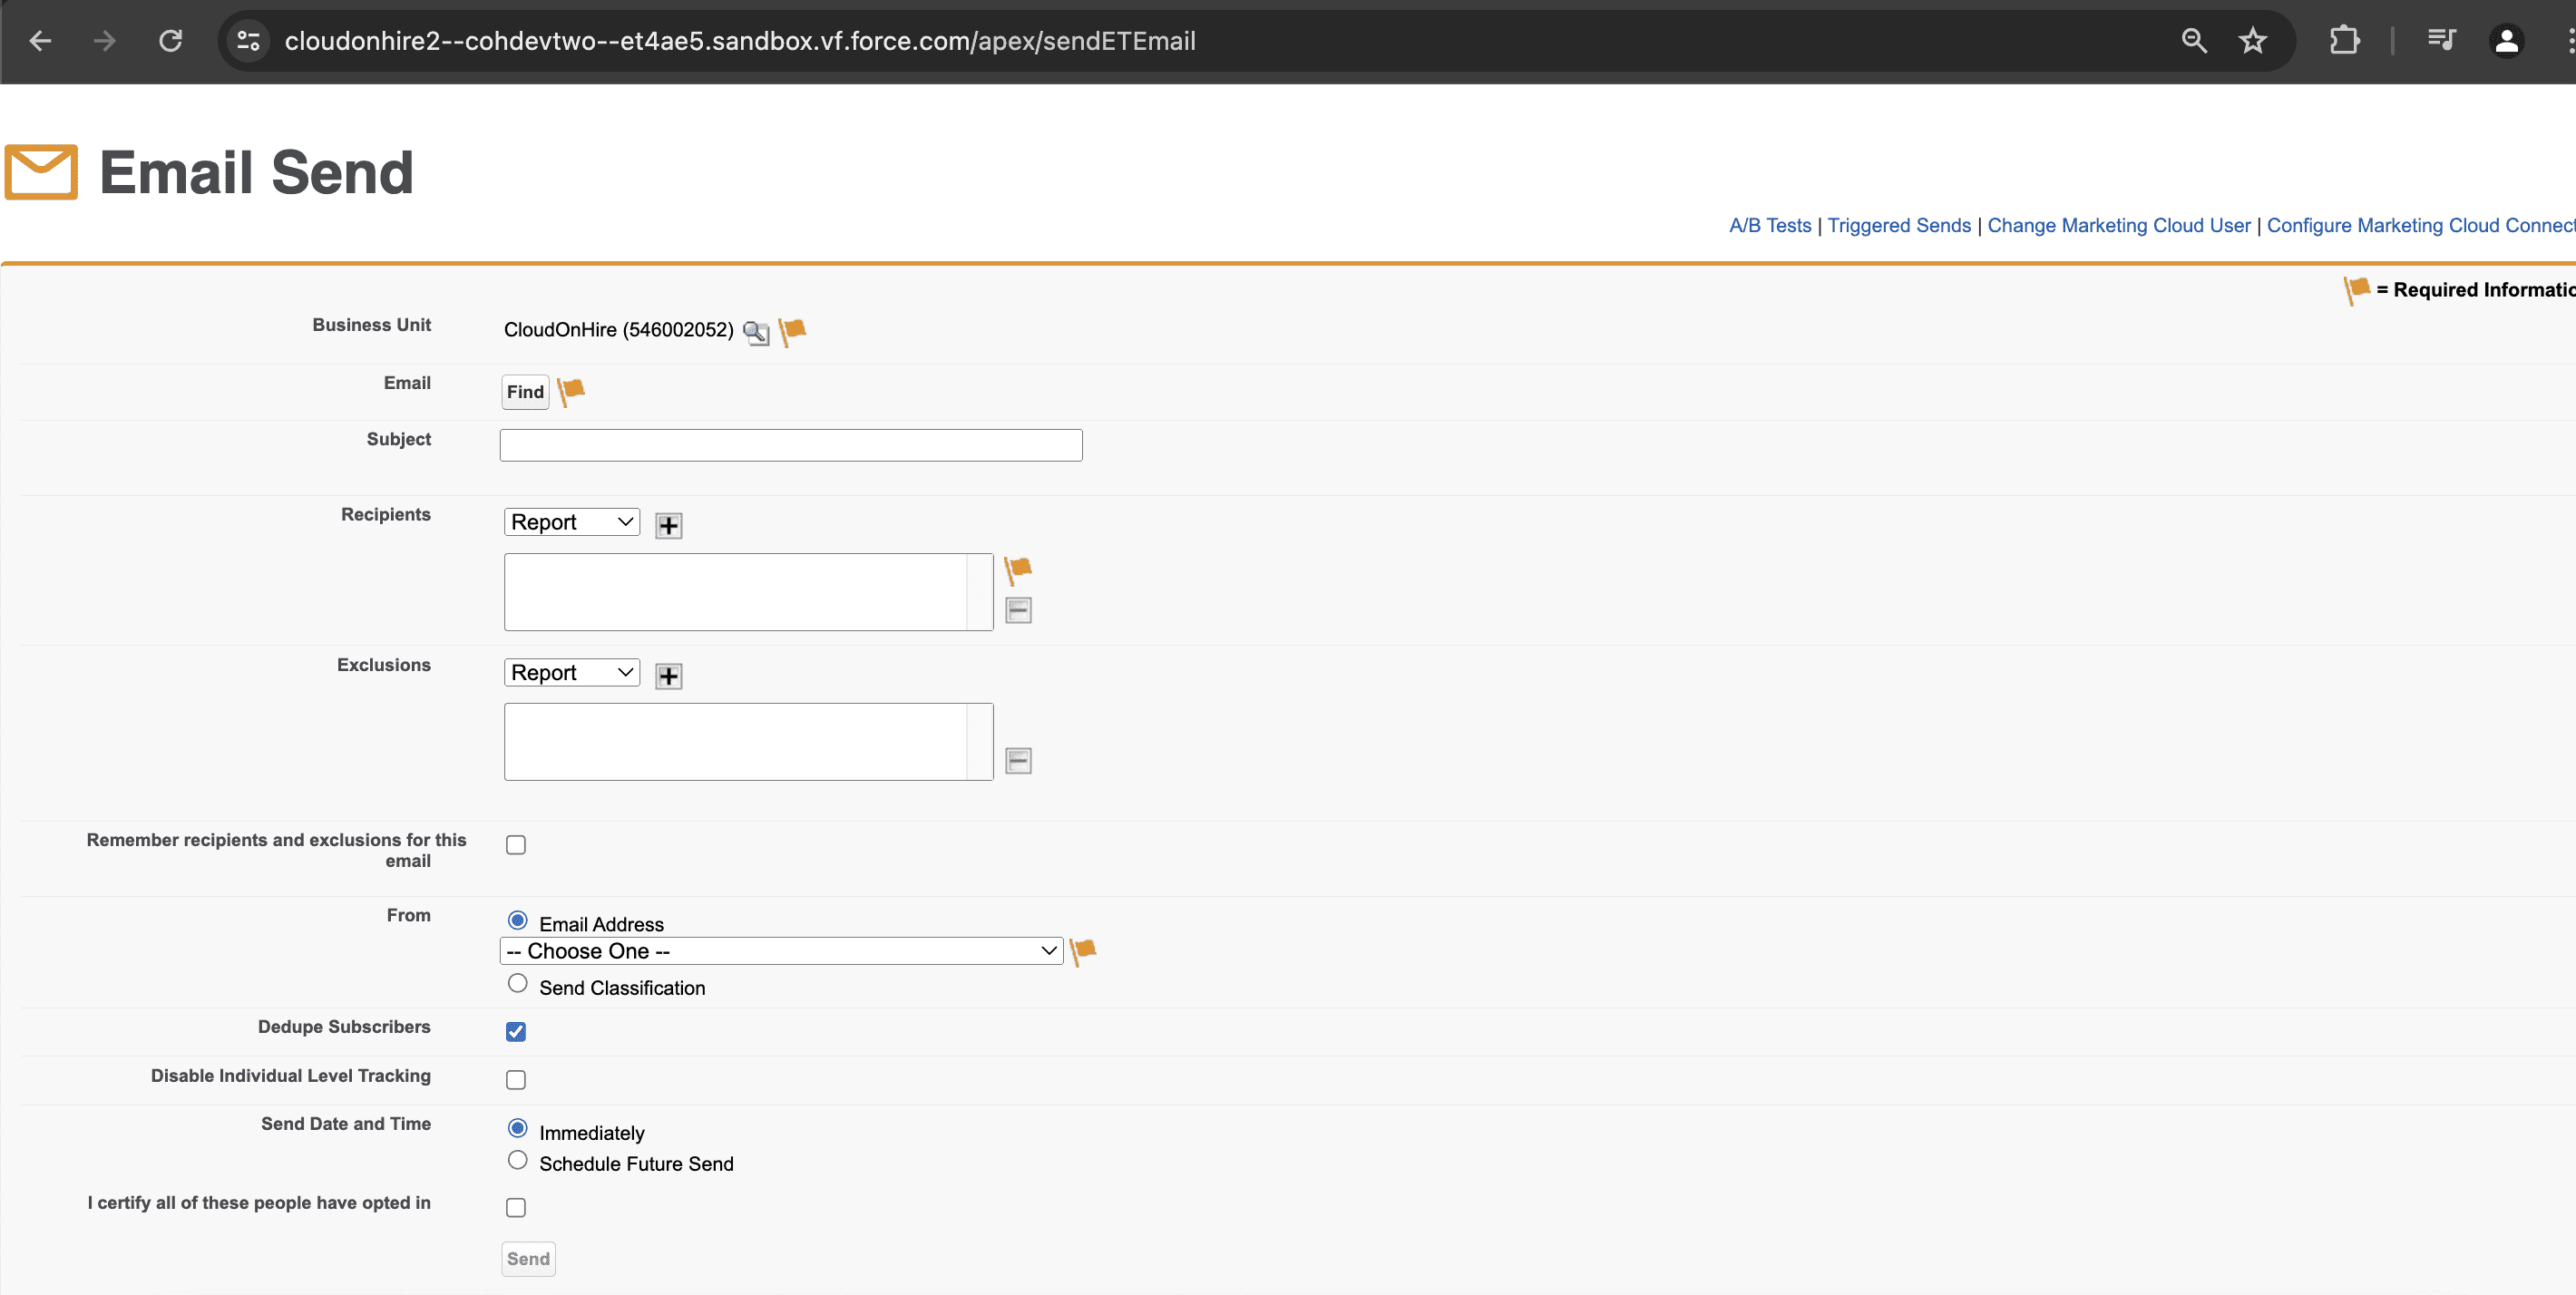
Image: Email Coming from marketing cloud in Salescloud
2. You can check the email corresponding to contacts an email is triggered.
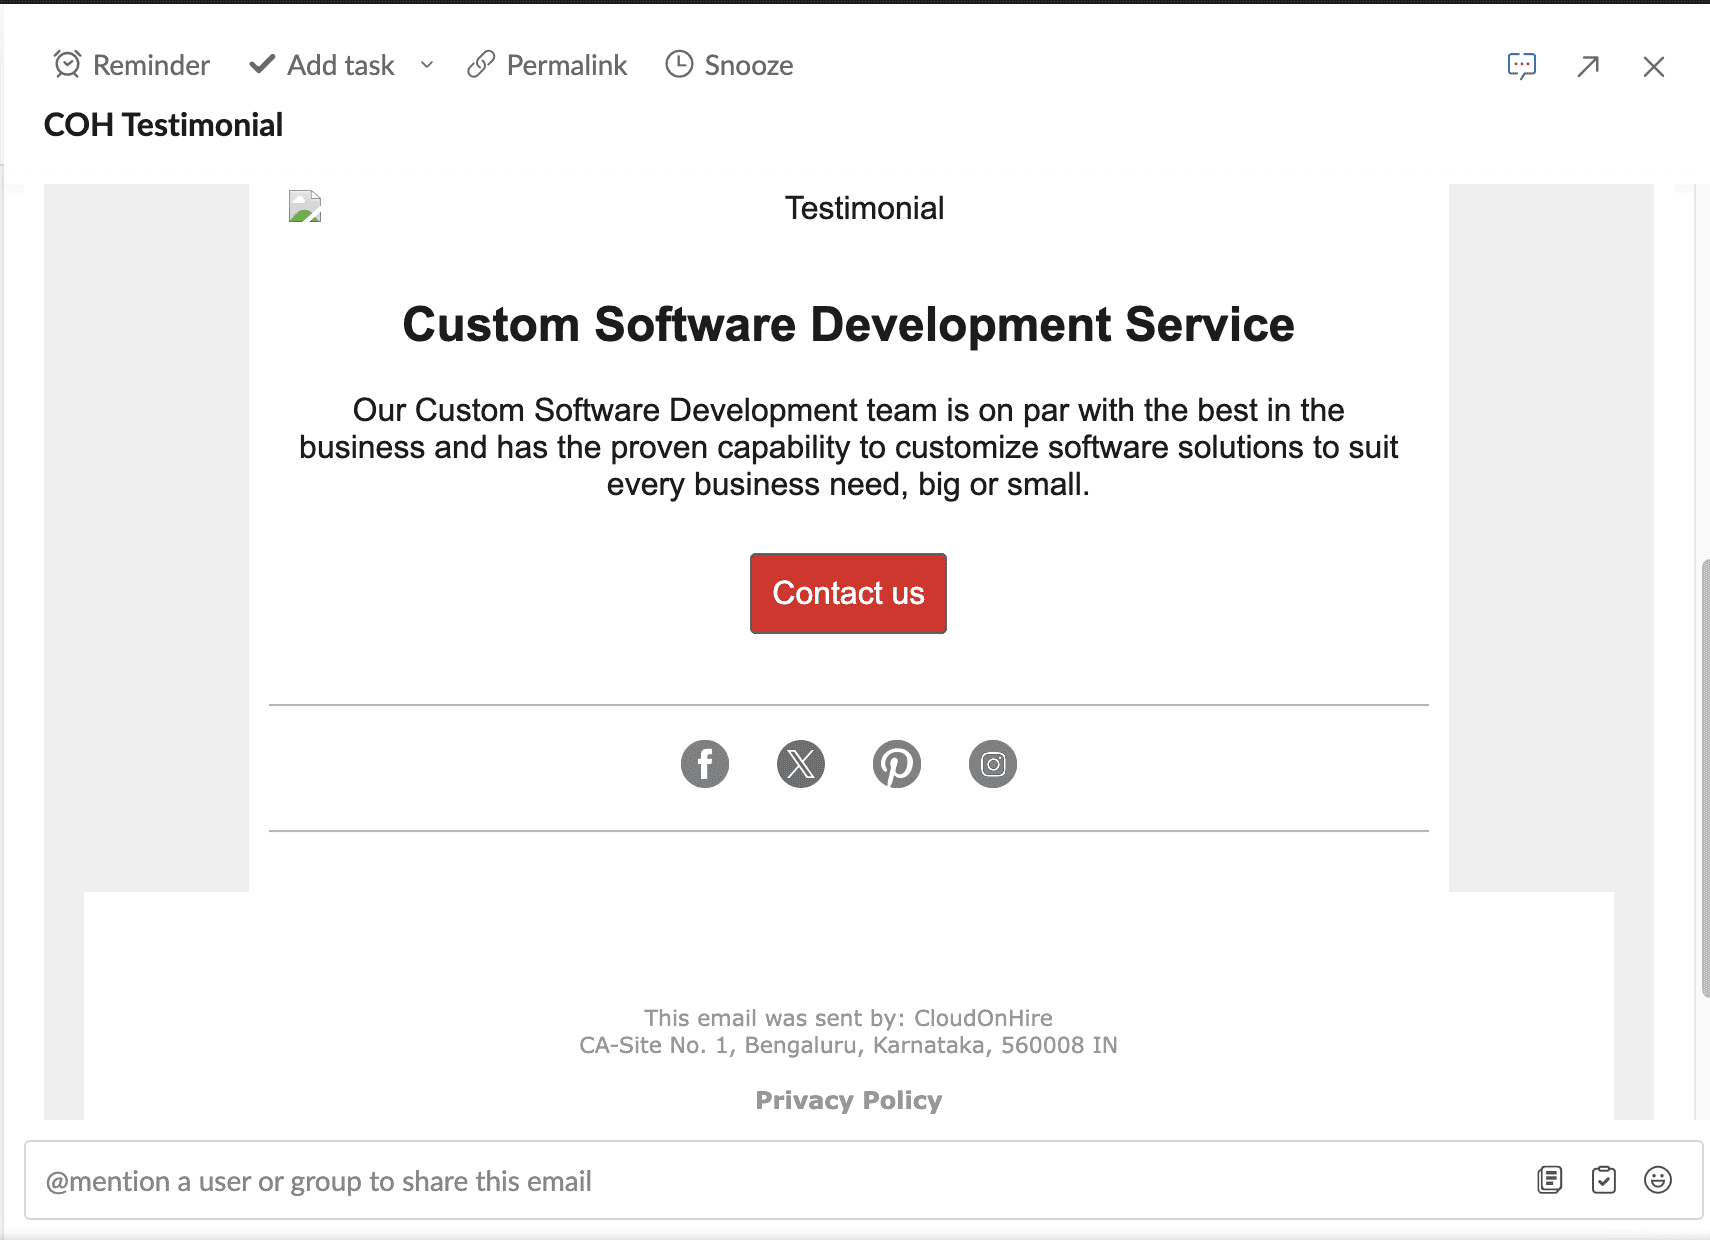
Image: received email screenshot
3. You can track the Tracking info under email send which is coming from Marketing cloud connector.
Image: Tracking Email sent
